Advanced Solutions - Advanced Information

Materials & Methods

Fall 2019

The ENT 3D project is at an exciting point.  It began more than four years ago and grew out of the earlier  Nose Cards project, which was a lot of fun to build.  Nose Cards is an 11-minute video that walks through sinus anatomy and problems using simple 3D models.  Chapters 1 and 2 of the ENT 3D project are ready to watch and cover the same topics in a much richer, more detailed way.   Chapter 3 is in progress and will cover common sinus and nasal problems and how they are treated.  After these first chapters, I will move on to more advanced topics for ear, nose, and throat doctors and anatomy students.
 
If you have a 3D viewer or red-blue glasses, start at the Stereoscopic Page.

Nose Cards

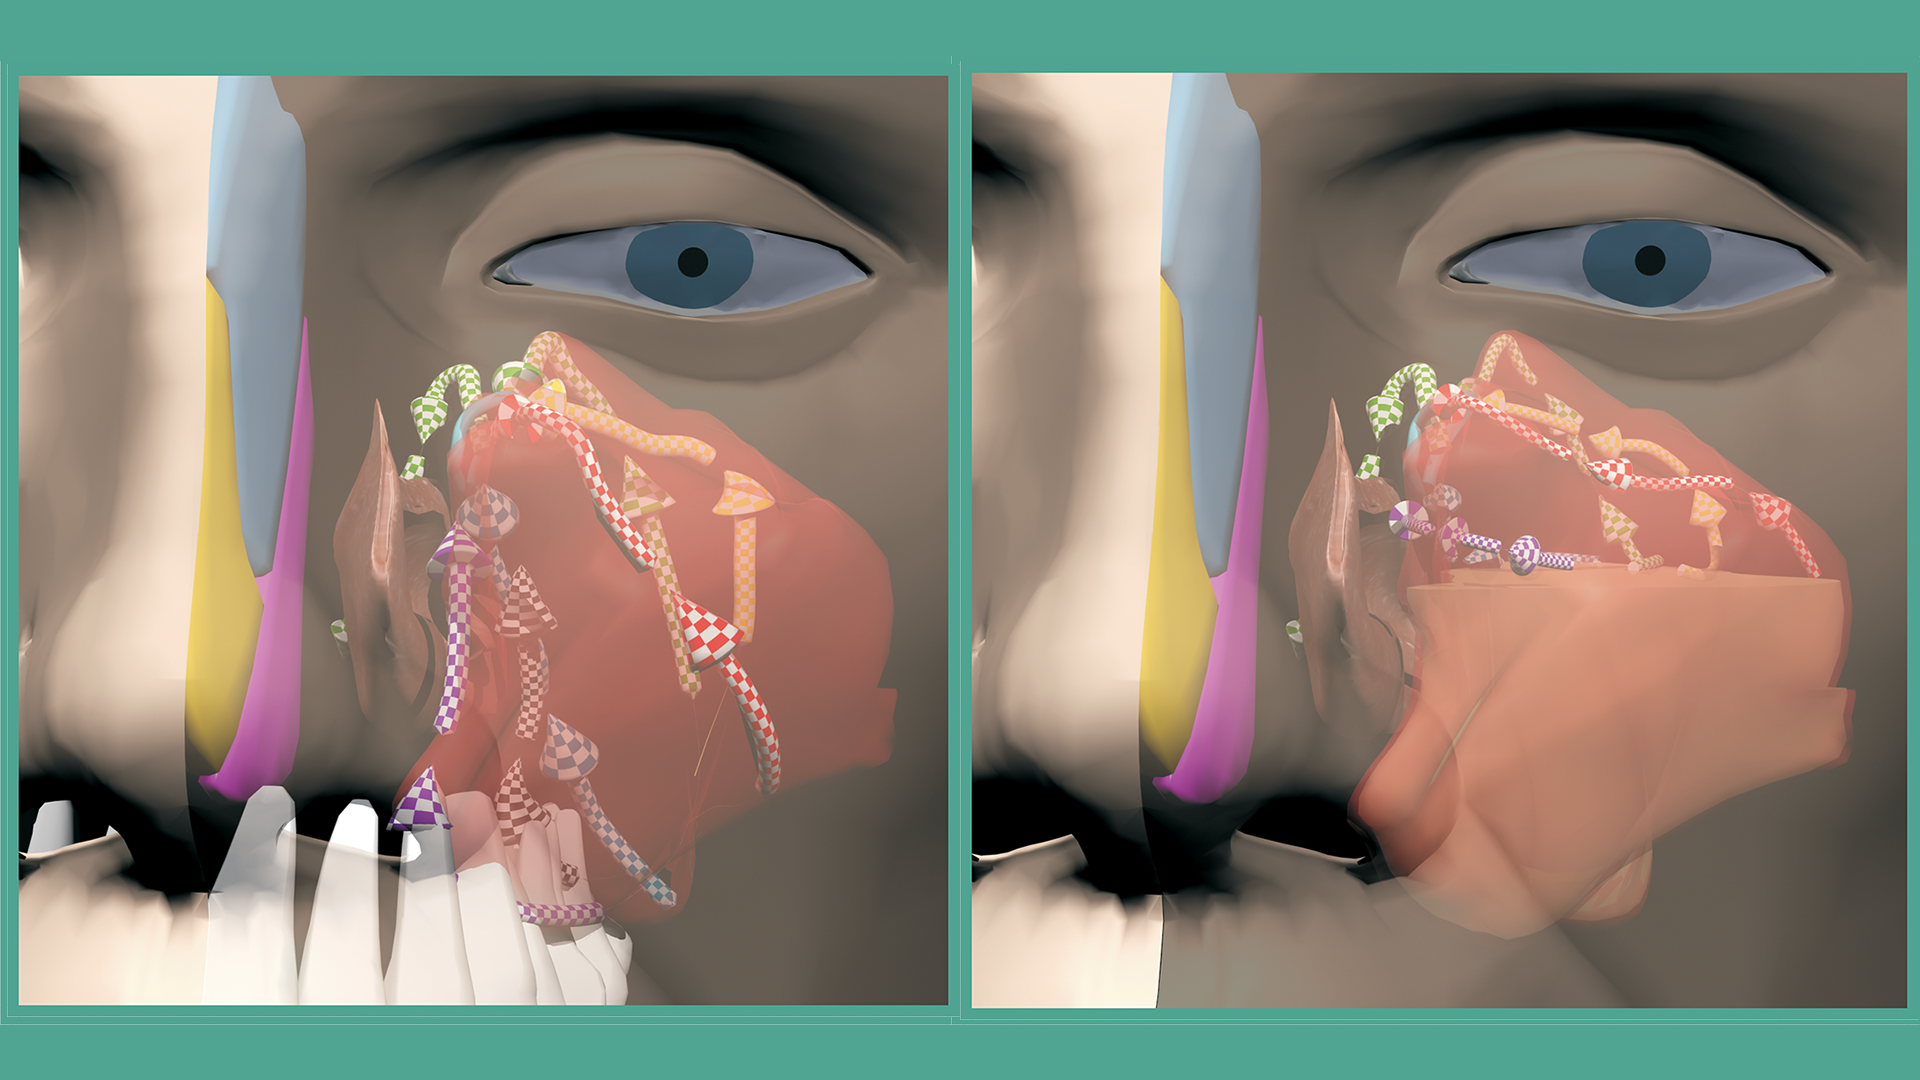
ENT3D was inspired by a project I started more than 20 years ago.  Back then I built a simple 3D model of sinus anatomy and put together a learning kit called Nose Cards. 

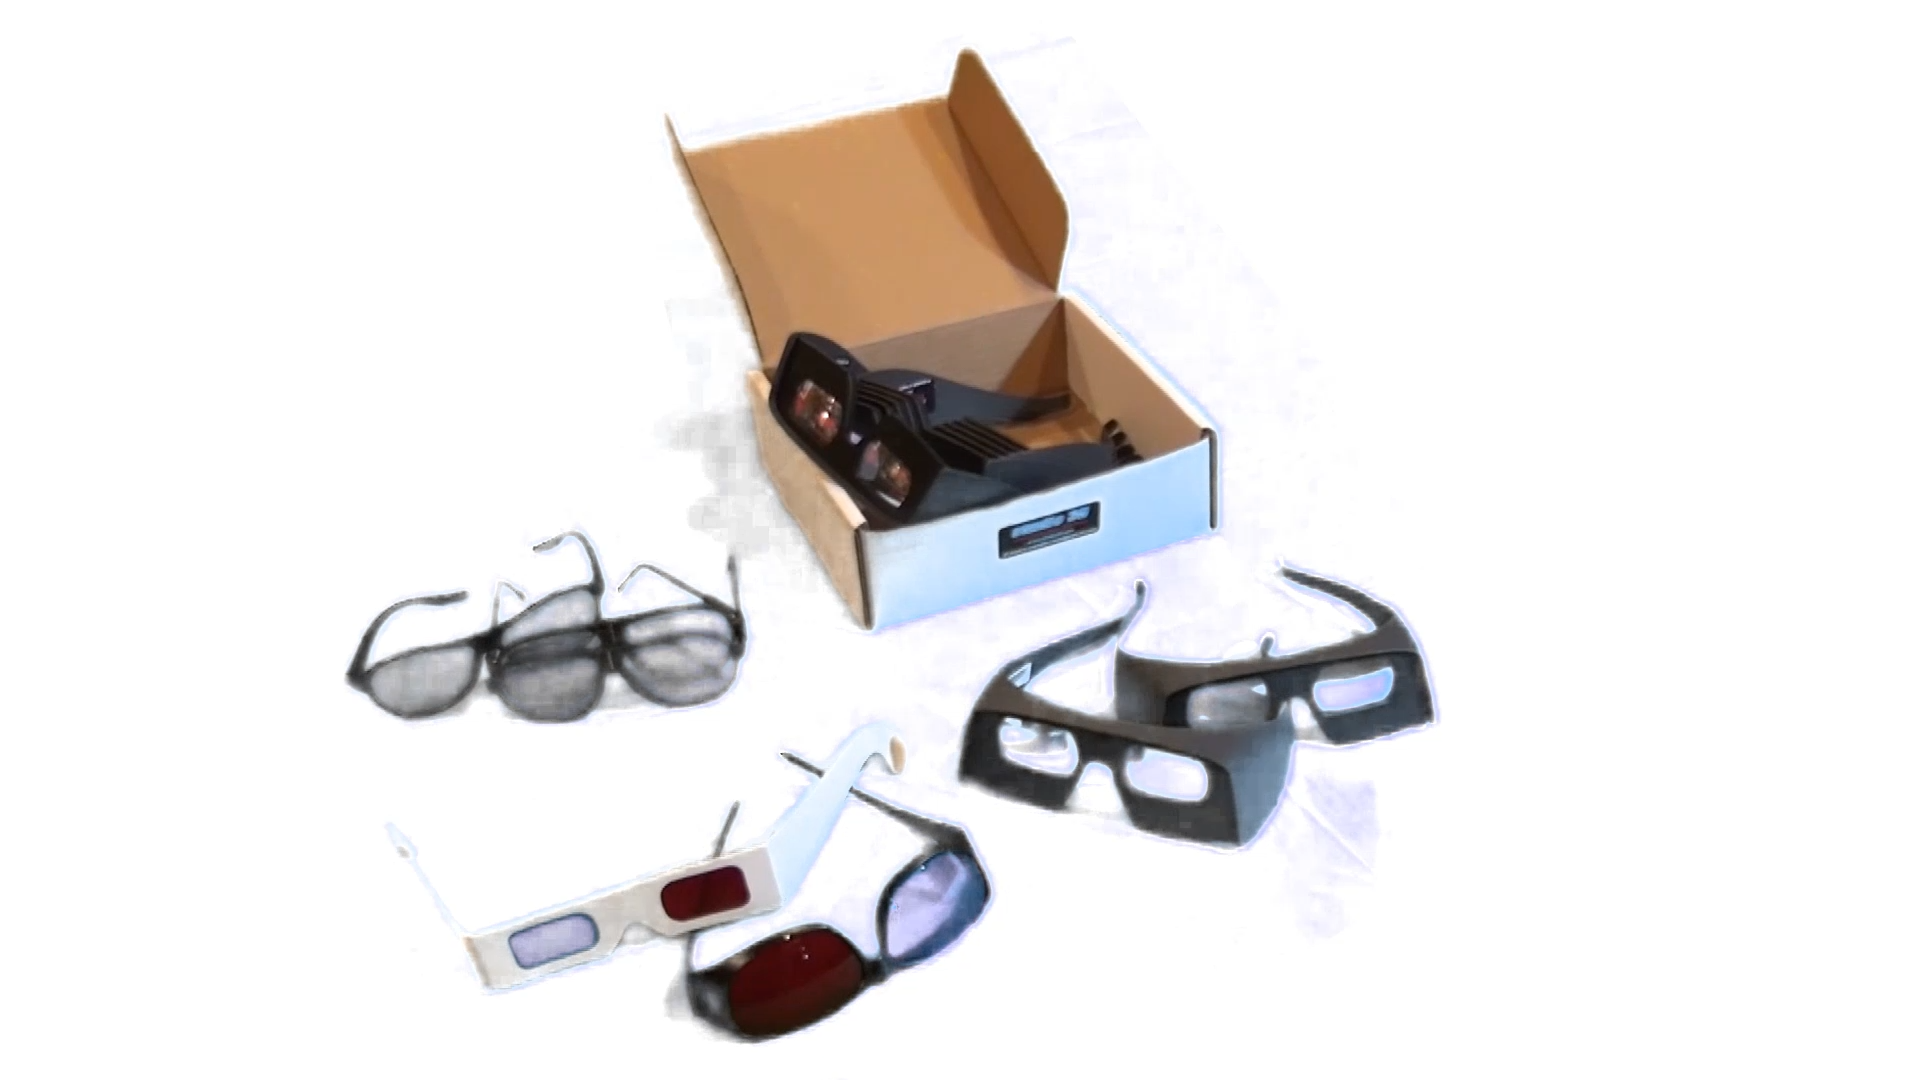
Nose Cards was published in 1999.  I used CT scan data and 3D Studio Max to create simple computer models of the nose and sinuses.  The kit was given to doctors and patients to explain how the inside of the nose and the sinuses are built and how they work.  The pictures were printed on cards that slid into a folding viewer for a 3D experience.  You can view the series as a slide show here. 

Hardware and Software

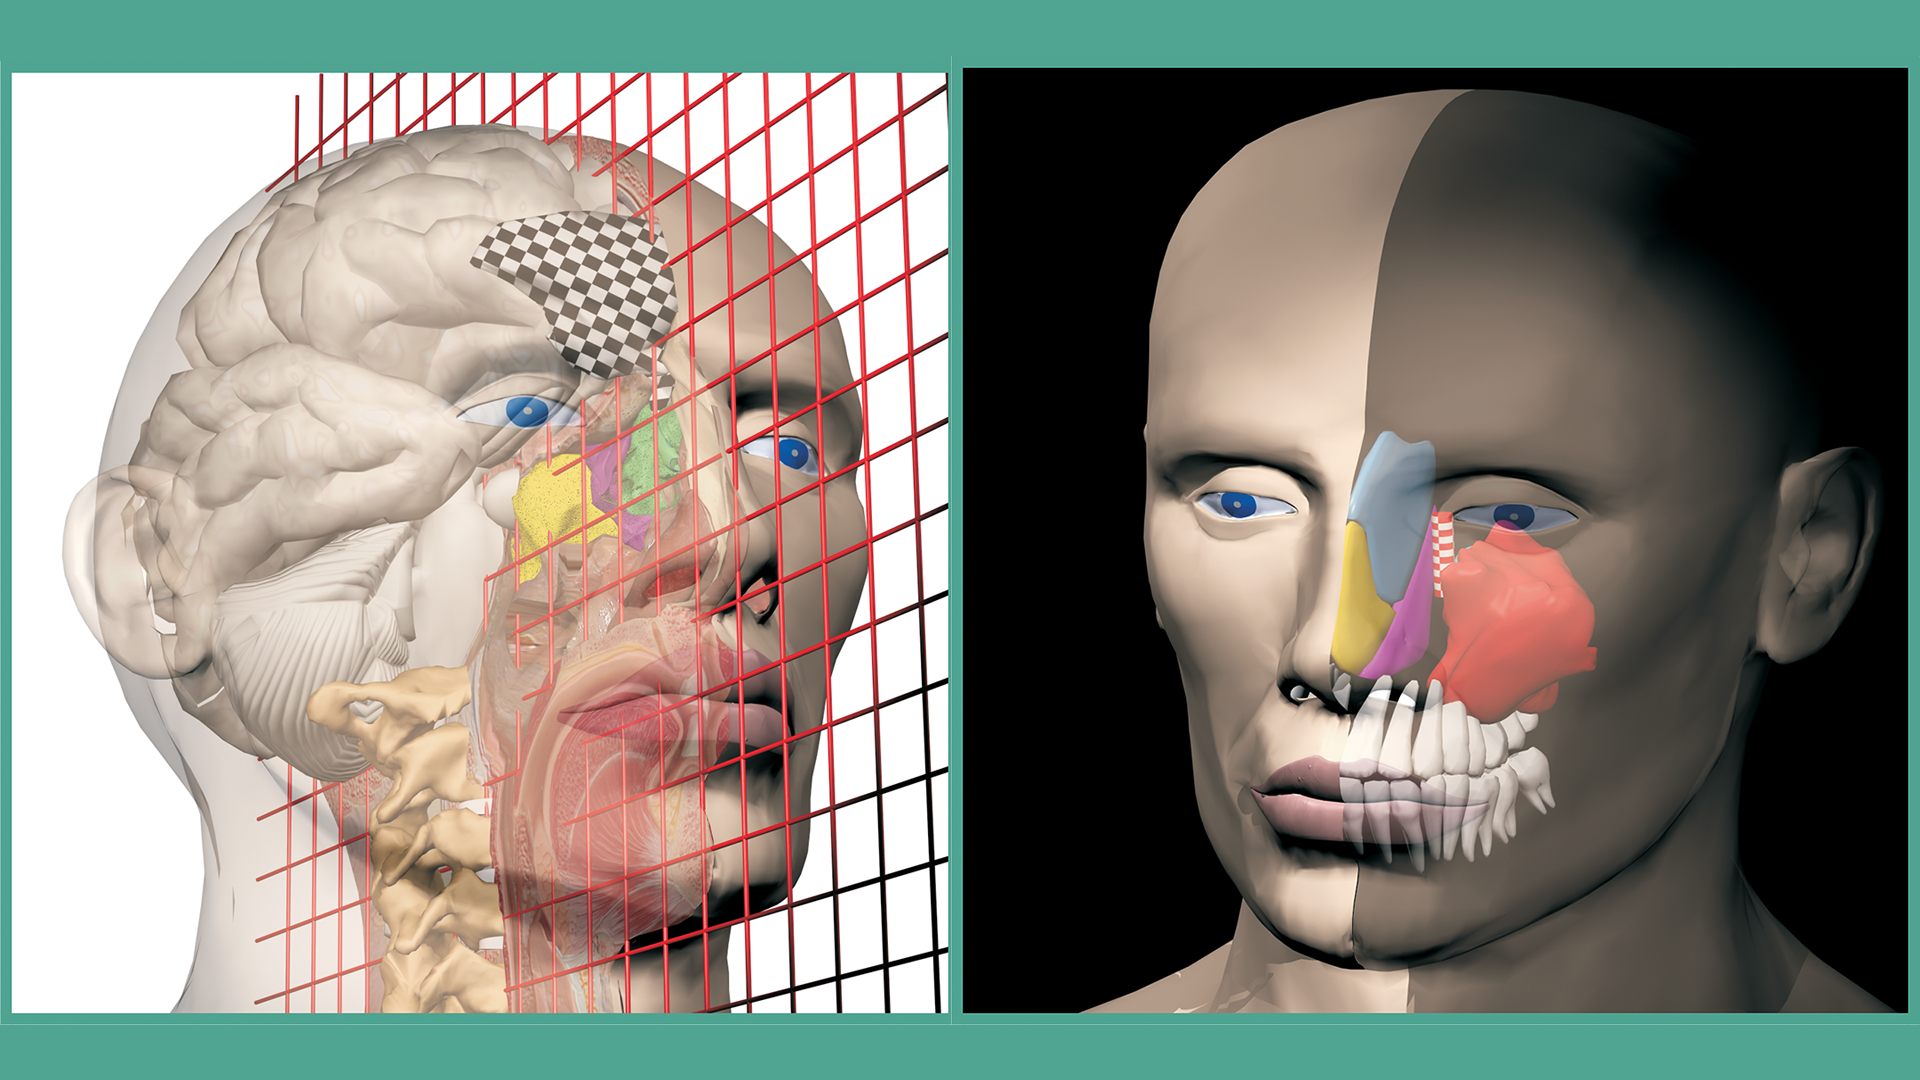
The original shapes came from high-resolution CT scans, which were opened in ITK Snap, a research radiology program that helps "segment" individual structures inside  CT scans and MRIs.    Those spatially accurate starter models were then brought into ZBrush, the industry-standard program for organic modeling and digital sculpting.  In ZBrush they were formatted into modern models with multiple resolution layers, displacement maps, UV maps, and textures.  The finished textured models were then moved into 3D Studio Max for animation and rendering with the V-Ray rendering engine.  My workstation is a fairly powerful 10-core overclocked i7 machine with multiple monitors and a high-end graphics card.  One of the monitors is a 55-inch 4K LG 3D TV, which is used to preview and fine-tune the 3D effects. 

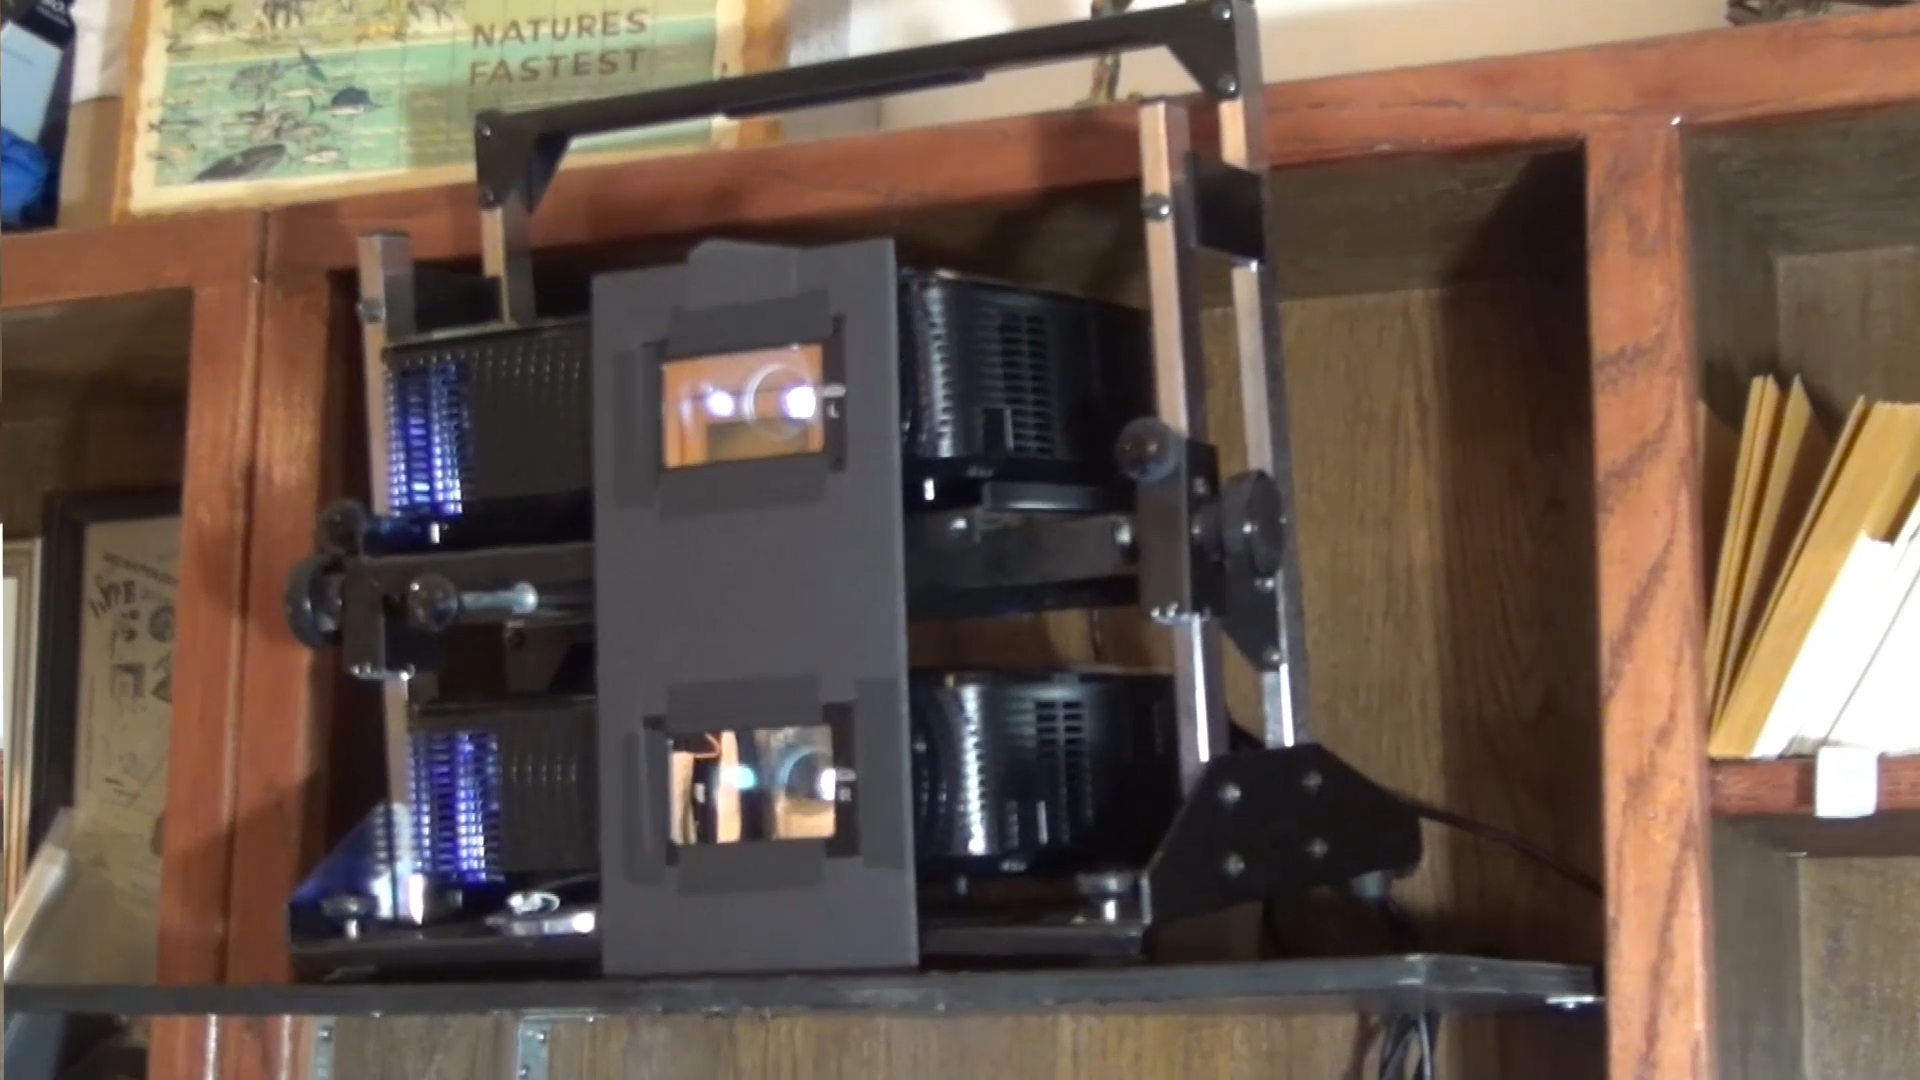
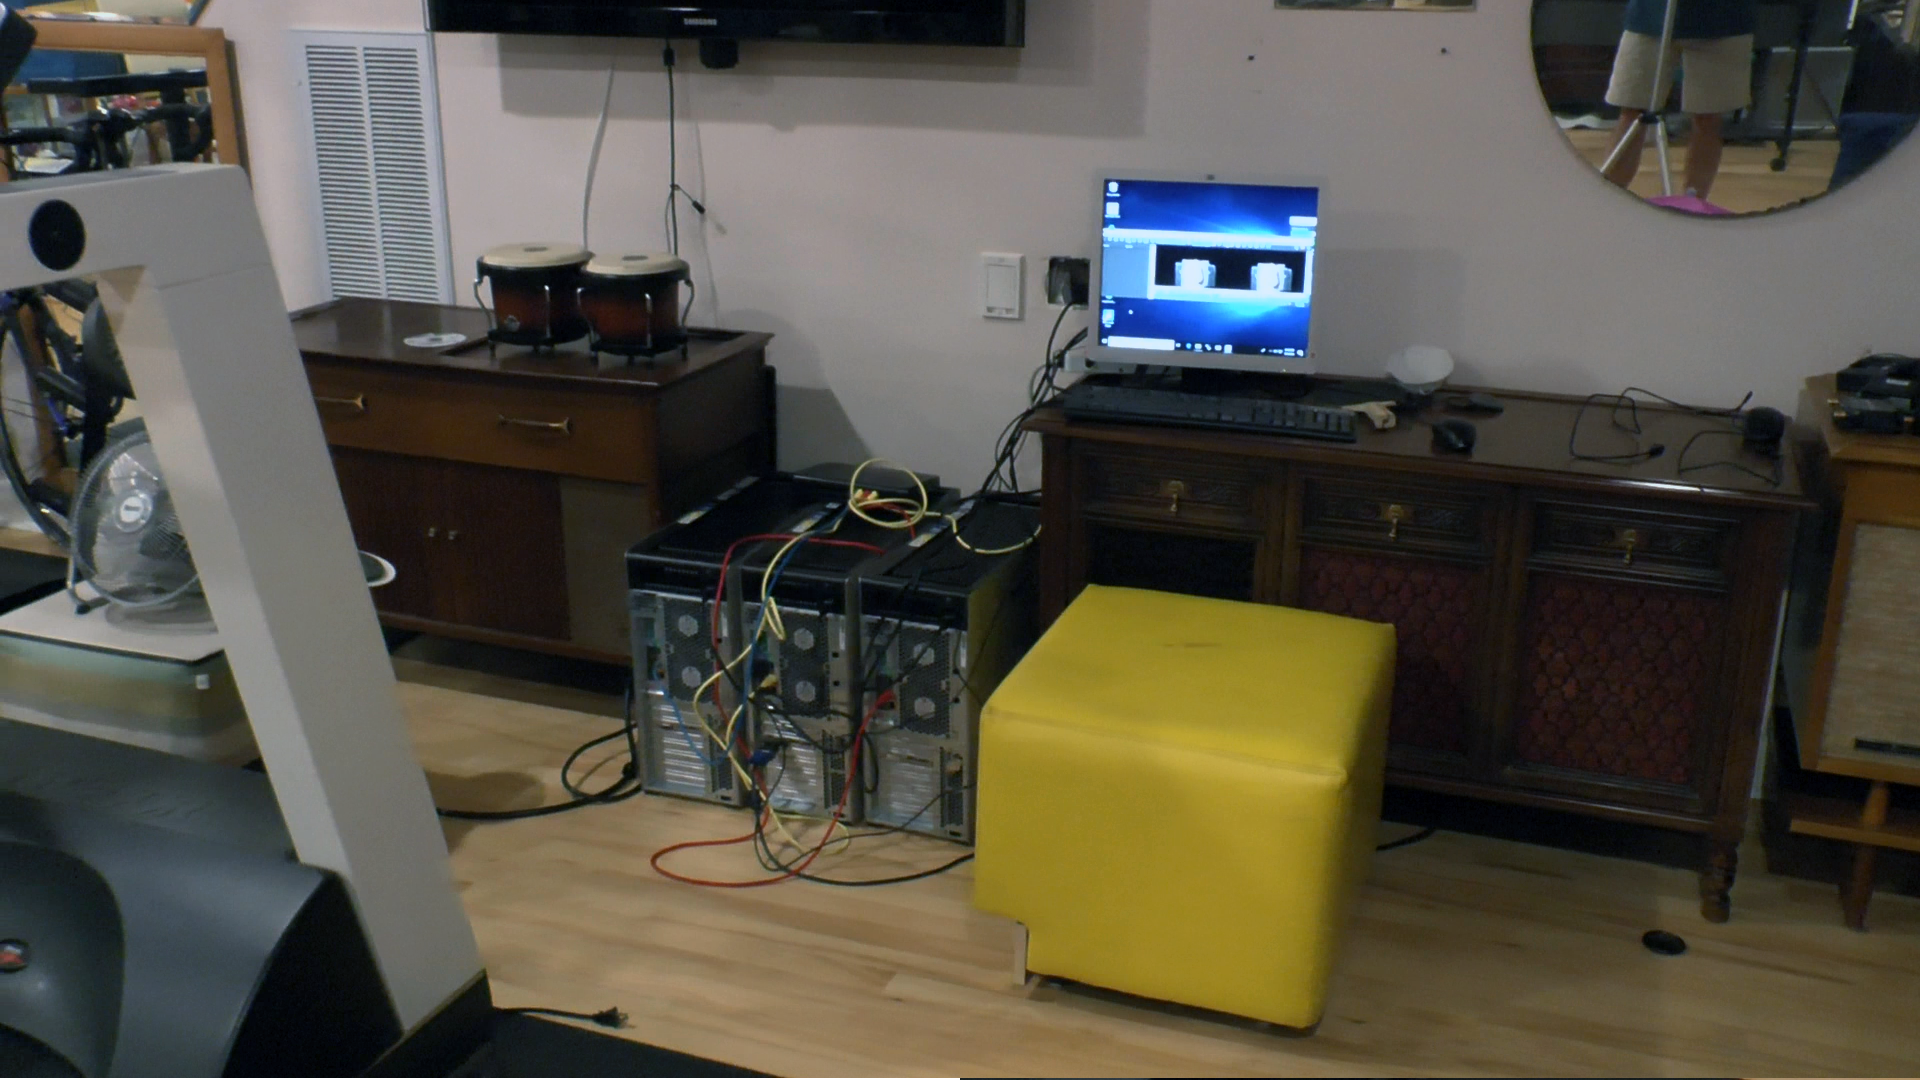
I also have two 32-core AMD Threadripper computers that act as a render farm to speed up production.  These "nodes" work day and night drawing frames.  High-resolution 3D images take a lot of computing power and time.

The finished images are then composited in Adobe After Effects or Premiere Pro.  Photoshop is used where needed.  Compositing the final renders lets each part of a scene be rendered separately and then combined, which gives more flexibility, a better final look, and more efficient rendering times.

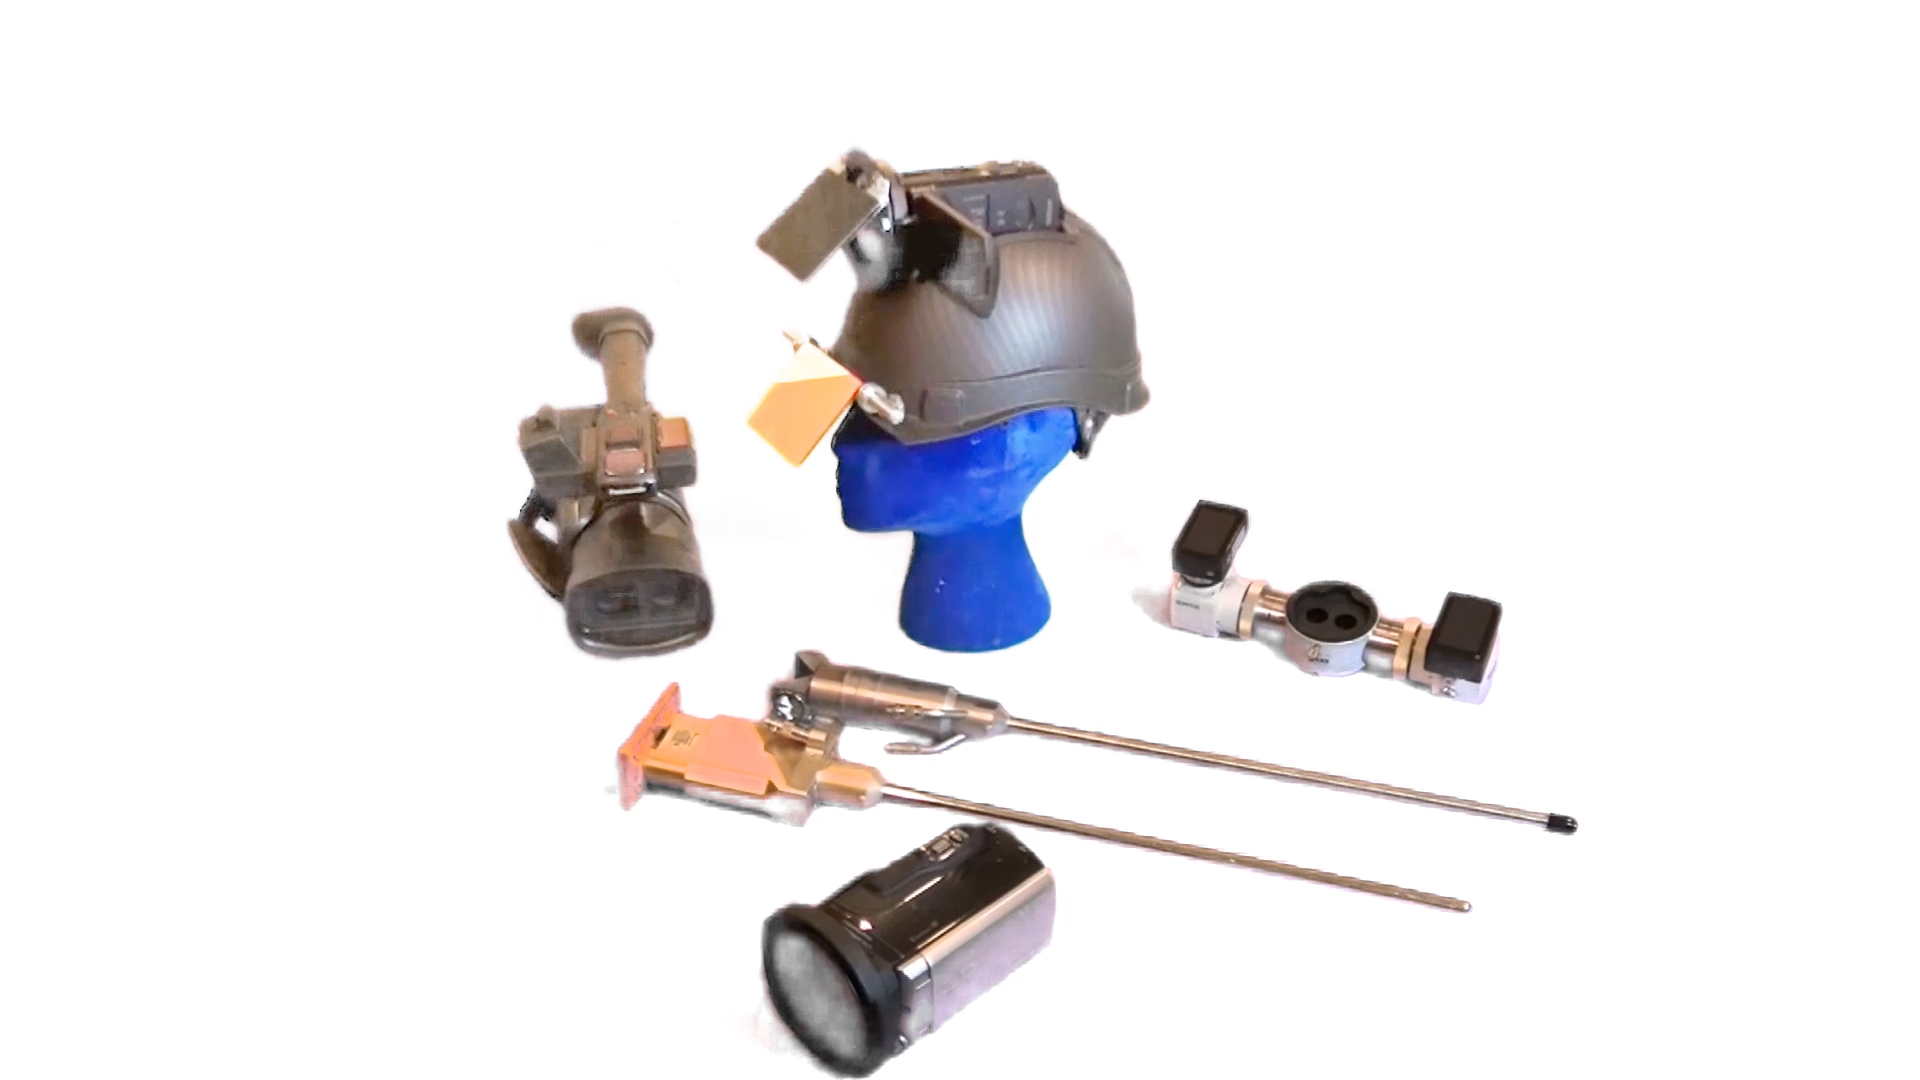
The videos are managed in Premiere Pro, and the 3D effects are handled with a plugin from Vision III Imaging.  This plugin also helps with editing 3D footage from my various cameras, which I use to record exam findings, surgeries, and other interesting medical recordings.  Some of the stereoscopic camera footage is in a format that needs to be converted using PowerDirector Studio®, a nonlinear editor with native 3D support.   The same program is also used to burn some of the final output onto 3D Blu-ray discs.

The CAD Model

There are several high-quality collections of 3D computer anatomy out there.  None of them have the sinus and nasal detail that ENT3D has.  Another thing that makes ENT3D different is how closely the CT and MRI scans are woven into the 3D models.  The sinuses, skull base, and ear structures are available at 0.3 mm interpolated resolution inside the 3DS Max environment.  They can be used like a "pseudo volumetric space" with full control of opacity and smooth blending with other 3D models in the same scene. Most 3D anatomy models are built for real-time, click-and-drag use.  That is a really neat approach, but it is a different direction than this project.  ENT3D is built in a format that could be used in real-time game engines and interactive virtual reality, but the plan is to create scripted tours and present them on high-resolution stereoscopic displays. 

 My model starts in ZBrush.  The base shape, multiple levels of detail, UV maps, displacement maps, and texture maps are all created and edited in ZBrush so they stay flexible for future use.  Animation and rendering are done in 3DS Max with the V-Ray rendering engine. 

I have tried the real-time anatomy models I know about.  At first, you spend a lot of time learning how to navigate the system and how to get the most out of the model and the visualization tools.

ENT3D is different in a basic way.  An expert in the anatomy, physiology, and problems of this area creates scripted tours and explanations.  The person who knows the content is also the person who built and manages the computer assets.  That combination makes it possible to create focused learning demonstrations that can be watched quickly over the internet or shown to large audiences and classrooms.

Nasal Anatomy Detail

One of the things that makes the ENT3D model stand out is its detailed and flexible view of the sinus and nasal anatomy.  I haven't seen any other 3D model that has the complete and detailed sinus and nasal anatomy ENT3D has.  The first topics focus on this area, but over time the project will also cover other ear and throat subjects.

The inside of the nose and the sinuses sit in a complicated spatial relationship with other important structures nearby.  The anatomy is hard to understand and even harder to master, especially because people's anatomy can vary and surgeries can bring unexpected challenges. ENT3D hopes that students of this topic will gain new understanding by using this new way of seeing the anatomy.

On top of the detailed 3D computer model, there is also a cadaver dissection of sinus anatomy that was recorded with 3D photography from two angles.  With modern software, those images are more flexible than ever and can be explored in ways that were not possible when the dissection and photo session were done years ago.

Camera Systems

It looks like the modern era of 3D is over.  "Prosumer" 3D camera systems stopped being made a few years ago.  Luckily, good used models are still available on eBay.  I have three Sony 3D TD camcorders with 3D-printed adapters that let them use macro lenses.  These cameras are great for closeups.  I have mounted one on a head-worn rig that gives a surgeon's-eye view of exams and procedures, and arms that reach out from IV poles hold the cameras for great surgical recordings.  For wider shots, I use the Panasonic Z10000, widely thought of as the best 3D "prosumer" camcorder ever made.  Both types record full 1080 per eye onto memory cards.  

For custom camera rigs I have two modified YI 4K action cams with C-mount changes.  They can be paired with different lenses and special mounts to make a 4K macro custom camera, attached to a Zeiss/Karl Storz microscope adapter for twin 4K views from the operating microscope, or mounted on 3D endoscopes that I have modified.  I bought stereoscopic laparoscopes on eBay that were designed for surgical robot systems.  Surprisingly, these very expensive robot laparoscopes can be found on eBay for about $100 each.  They need some custom work to use outside of their original systems.  With those changes, I can mount the two 4K cameras on them and record exams of the mouth, throat, and skull base.  
I have been collecting and editing interesting findings for some time and will include these 3D videos in future presentations.

Display Systems

In 2016 almost every high-end TV had 3D built in.  By 2018, only one TV still had this option.  The high point of 3D TV sets was the 2016 LG passive OLED 4K series.  They came in 55, 65, and 77 inch sizes.  I have been buying these used on eBay, and a few unopened ones too. I use the smallest as my main 3D monitor for my workstation.  These TVs often sell for a premium used, and they won't be around much longer.  To get ready for live presentations, four of the 65-inch and two of the 77-inch sets have been mounted in custom road cases for easy rolling transport to venues.  They have built-in stands so they can be set to different viewing heights.

Besides these special TV sets, projector systems are a great way to view 3D footage.  There are still plenty of 3D projectors available.  To show 3D footage to a large audience, though, it is typical to use two projectors together with filters so that passive 3D glasses can be used.  This is the same approach used in movie theaters for 3D films, with polarized glasses.  One downside of polarized glasses is that a special kind of projector screen is needed.  ENT3D has the Omega Optical system, which uses band-pass filters and special glasses so that 3D projection can be shown on regular white projector screens that are already installed in many classrooms and venues.  Some venues work better with multiple smaller monitors.  Four 65-inch and two 77-inch LG OLED displays are available for those cases.  For the largest venues, I have both a 120-inch and a 165-inch free-standing silver screen.  GeoBox demultiplexers turn the 3180x1080 signal into a dual-stream HD output for the two projectors.  I have both the 700 series and a 601 series.

On top of 3D TVs and projectors, stereoscopic footage can also be viewed with virtual reality headsets.  The Oculus Go is especially nice because it costs only about $200 and doesn't need any other hardware.  The presentation can be streamed over the internet or loaded directly onto the headset.  The resolution is not as good as projectors or TVs, but it is still very clear.

A  range of very inexpensive viewers can also be clipped onto a smart phone.  The most common of these is the Google Cardboard viewer.  It is a cardboard box with lenses that you slide your phone into, and you can watch 3D media for almost no cost.  The experience is similar to a VR headset.